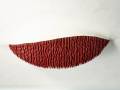
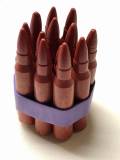
Dimensions : 32 x 42 x 10 inches Medium : encaustic wax, the artist’s blood, oil paint, plasticized elastane (aka Lycra), wire, metal rod Made : Nov 2018 – Mar 2021 Featured photograph byFrancine Zaslow Photography
About
This project was motivated by the ongoing mass shootings in the USA. I wanted to make a piece that conveyed some of this shock and discomfort through a metaphorical representation of the tearing of American social fabric. The cast bullets are exact replicas of those used in an AR-15 rifle, a weapon now largely associated with mass shootings. They contain my own blood, seeking to evoke a visceral and shocking reaction. The slick and wet looking substrate is a metaphor for an unhealthy social fabric. The large mass of bullets erupt through this fabric to evoke movement and motion, tearing it and leaving the viewer feeling unsettled and uncomfortable. The central horizontal positioning is deliberate and intended to add to the unease. This project was one of the most complex and satisfying pieces I’ve made. Special thanks to my dear friend Francine at Francine Zaslow Photography for photographing the featured image.
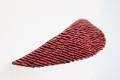
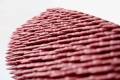
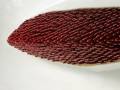
Detail
Thumbnail 1
Thumbnail 1
Thumbnail 1
Thumbnail 1
Thumbnail 1
Thumbnail 1
Thumbnail 1
Making
Thumbnail 1
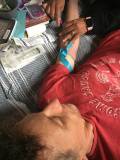
Blood is drawn.
Thumbnail 1
AR-15 rifle 'snap caps' will be used for making the bullets casting mold.
Thumbnail 1
Making the bullet casting mold with the snap caps.
Thumbnail 1
A third silicon bullet casting mold is made (supported between two previously made molds)
Thumbnail 1
The snap caps are removed from the silicon mold.
Thumbnail 1
Blocks of encaustic wax with the drawn blood are made.
Thumbnail 1
An estimate of the number of bullets (and wax) needed is made.
Thumbnail 1
Different blood-based encaustic wax and oil paint pigment recipes are tested.
Thumbnail 1
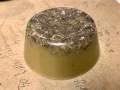
The encaustic blood wax is melted down.
Thumbnail 1
The blood and paint encaustic wax is made using the earlier recipe proportions.
Thumbnail 1
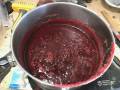
The blood and paint encaustic wax cooking.
Thumbnail 1
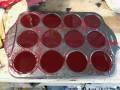
The blood and paint encaustic wax is poured into block molds.
Thumbnail 1
The encaustic blood / paint wax is left to cool.
Thumbnail 1
Test casting is done using the new wax and molds.
Thumbnail 1
The cast test bullets are de-molded.
Thumbnail 1
Tests of wax recipes and bullet castings.
Thumbnail 1
Casting blood bullets (done under extractor fan to avoid breathing in encaustic wax fumes).
Thumbnail 1
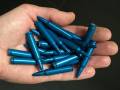
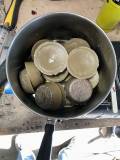
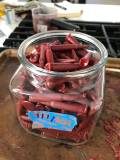
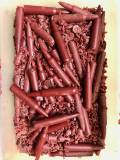
Some cast blood bullets.
Thumbnail 1
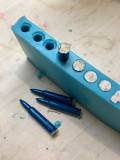
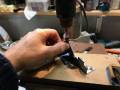
A hole is drilled into the center of each bullet to receive a mounting rod.
Thumbnail 1
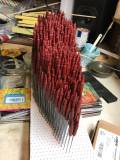
Bullets with mounting rods start to take over the studio.
Thumbnail 1
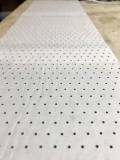
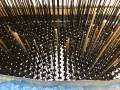
An isometric dot grid is created and attached to the mounting plate. This grid allows for ideal packing of the cylindrical mounted bullets. Holes are then drilled, using the grid template, into which the rods will snugly fit.
Thumbnail 1
The rods are inserted into the tight fitting holes. The hole size is carefully chosen to allow the rods to fit tightly but allow some movement.
Thumbnail 1
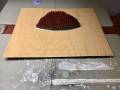
The mounting continues and starts to fill out the final shape.
Thumbnail 1
All trimmings or broken bullets are recycled back into usable wax for casting.
Thumbnail 1
The mounting continues. The mounting holes are just tight enough to allow the rods to be snugly moved up and down to set each bullet's height, like a stiff pin impression toy.
Thumbnail 1
The bullets are mostly installed, ready for final height adjustments.
Thumbnail 1
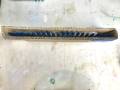
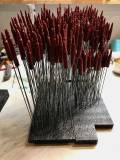
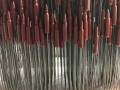
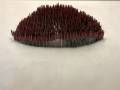
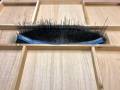
A close-up of the rod forest.
Thumbnail 1
Lycra (elastane) is tested with different slit patterns.
Thumbnail 1
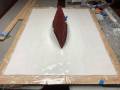
The chosen slit shape is cut into Lycra which is then laid over the bullets for their adjustment into position.
Thumbnail 1
The bullets' positions are adjusted.
Thumbnail 1
The bullets' positions are fine tuned. The tight fitting rods keep them in place.
Thumbnail 1
The Lycra mounting wood is prepared. The underlying bullet mount will be bolted to this and the Lycra will be overlaid.
Thumbnail 1
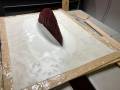
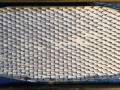
The Lycra is plasticized around the bullets to set it into an initial form.
Thumbnail 1
The entire Lycra panel gets plasticized, with the background board underneath.
Thumbnail 1
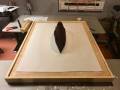
The bullets mount is bolted to the background board, which is then painted.
Thumbnail 1
The frame is built and installed.
Thumbnail 1
The frame is mounted into a custom jig which will allow the piece to be rotated face down.
Thumbnail 1
With the piece face down, a dam is created around the mounting rods. The rod holes are then sprayed with a rubber sealant to prevent leakage in the next step.
Thumbnail 1
Liquid plastic is poured into the dam which will secure the rods in place.
Thumbnail 1
After the plastic is set, the rods are trimmed.
Thumbnail 1
Close-up of the trimmed rods.
Thumbnail 1
The jig is used to safely rotate the piece back upright.
Thumbnail 1
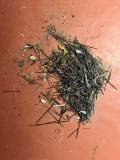
The very sharp rod trimmings that were flying around during the trimming are cleaned up.