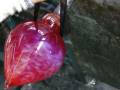
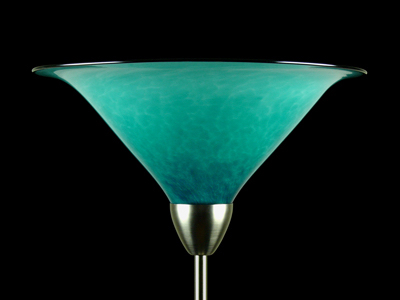
Between 2001 and 2004, I fell in love with the art and craft of glassblowing – a technically challenging and demanding craft requiring complete focus and precise team choreography in an environment of heat, noise, smoke and danger. In other words – perfect!! For a few years, I had a small business making hand-blown glass lighting. Below are some examples of torchiere lamps I made during this time. Click on a photograph for more details. On/off pictures are aligned. Scroll down to the end for a glassblowing slideshow.
The glass-blowing process of making a cone shaped lamp:
Thumbnail 1
First a piece of solid white glass bar is prepared. This will form the white inside of the shade. It is pre-heated to 900 deg F in an oven and then progressively heated until almost molten.
Thumbnail 1
When the white bar is almost ready, a clear bubble is prepared onto which the molten white will be overlaid.
Thumbnail 1
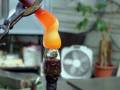
The white overlay is then carefully applied. Carefully it is worked to form a layer covering the bubble through successive reheats in the glory hole and marvering.
Thumbnail 1
A gather of glass is taken from the furnace. The molten glass is about 2000 deg F. This gather will be the receptor for the subsequent color layers & provide material for the required lamp size.
Thumbnail 1
The color receptor layer needs to be thin for this particular lamp so some hot glass is stripped.
Thumbnail 1
The first of numerous careful color applications is made. Different techniques are used for different effects and styles. Here we see the first coat of 4 application steps being applied.
Thumbnail 1
The color layers are carefully heated in the glory hole and melted into the clear receptor coat. Eventually these color layers will be sandwiched between two clear layers.
Thumbnail 1
After the color layers are completed & the mass shaped with a block, more molten glass is gathered. This will form the outside layer of the lamp & provide material for the shade of this size.
Thumbnail 1
The blowpipe is cooled occasionally to avoid burnt hands. Gloves are not generally worn.
Thumbnail 1
The hot mass is shaped using a cherry-wood block which is soaked in water before each use.
Thumbnail 1
The shape is carefully heated & stretched while the assistant blows. The correct amount and location of heat in & over the mass is critical at all steps throughout the entire process.
Thumbnail 1
More careful shaping and inflation is required. This time a wet newspaper is employed.
Thumbnail 1
A neck is established using the jacks (a large tweezer-looking tool). This forms the top of the shade.
Thumbnail 1
Further shaping and cooling is done while the assistant (Andrew Sherman here) provides air.
Thumbnail 1
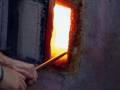
Between steps, the work is reheated in the glory hole (2000 F). Heat is applied carefully & the marver, jacks, paper, air & wood provide for cooling in different ways.
Thumbnail 1
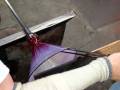
An opening is formed in the end of the piece. This move is colloquially known as a jack-and-crack. A knob shape is formed and tapped off. Timing and correct heat is critical.
Thumbnail 1
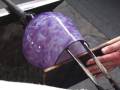
The opening is prepared and a lip wrap of black glass is applied.
Thumbnail 1
The conic form opening begins using the jacks while the assistant carefully paddles the lip to ensure flatness. During the entire process from bubble to annealer, the piece is continually being rotated - equally clockwise and anti-clockwise directions.
Thumbnail 1
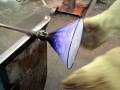
The form finally takes shape as it is opened up further. The paddle acts as a flattening surface and a heat shield.
Thumbnail 1
The form opening is completed while the wooden paddle is used as a heat shield to protect the gaffer's arm from burning.
Thumbnail 1
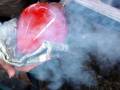
Finally the shade is carefully removed into gloves to be placed in the annealer where it will be slowly cooled overnight. The piece is quality controlled and if satisfactory then cold-worked and fixtures added.


")


")